| |
| Design & Printing Tip August 2013 |
08/19/2013 |
Hello! We are back with another Design & Print tip for you. This month we are looking at raised ink.
Raised ink is by far one of our most popular finishing options. Raised ink for those of you who are not familiar- Raised ink / Thermography is a process in which heat is applied to a CLEAR epoxy, causing the designated area to rise. Unlike embossing the raised ink does not affect the opposite side of the card (no indentation is made).
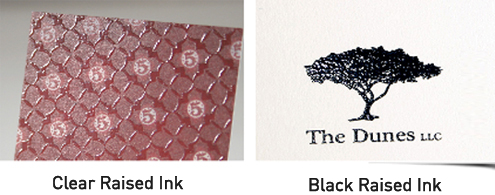
There are two types of raised inks, there is clear and black. When raised ink was first developed it only used the black raised ink. Today Black raised ink is used when the designated raised ink areas are all black. When the designated raised ink area uses colors other than black then the clear raised ink is used. The clear raised ink is applied on top of the designated printed areas, giving the illusion that the raised ink itself has color. Due to this Clear raised ink process there is no limitation on what CMYK values can be used for raised ink. |
 |
When your files are submitted the technician determines if your order needs black raised ink or clear raised ink. Also we highly recommend that you do not process raised ink on areas that are too wide, because of the processing it is possible that bubbling can occur, so it is not good for backgrounds, for large areas we recommend you consider our Spot UV finishing option instead (only available on standard coated 14pt matte). Likewise small / thin text is also not recommended as details can be lost. Raised ink is best applied over logos, large text, or used to create a patterned texture / background.
Because of our heating process with the raised ink it is not possible to apply both black and clear raised ink. If your design contains a designated raised ink area with both color and black printing colors, then clear raised ink will be used.
Now that you know a little more about raised ink, we will look forward to seeing some creative uses of this finishing option! |
|
|
 |
|

